|
|
 |
|

| The Original |
During the Second World War the United States Armed Forces had primarily relied on the ambiguous M-4 in all its variants. Unfortunately US tankers often found their mounts outclassed by German Panthers and later King Tiger heavy tanks carrying 8.8cm high velocity guns. Only in the last weeks of the war did limited numbers of 9cm armed M-26 Pershing tanks enter service and give the Americans a parley in armor protection and armament.
What was not readily apparent to American planners was the extent of the arms race on the Eastern front during the war resulting in both German and Soviets fielding ever better armored and armored tanks. Only when the Soviets revealed the JS-3 at the May 1945 Victory Parade did the Americans and British realize how far behind they were in tank designs.
An American response took another five years to formulate as prototypes T-30, 32, 34 (mounting 10.5cm, 15.5cm and 12.0cm guns respectively) were produced in small numbers and trialed. Finally in 1950 the US Army settled on a new design, the T-43 armed with a 12.0cm high velocity cannon in a huge, turret. Unfortunately the design still had a number of flaws (over 200) before the 300 or so machines manufactured between 1954 and 57 would be accepted for service.
Meanwhile the United States Marine Corps was continuing to digest the lessons of the island hopping campaign in the Western Pacific. Among the concerns that needed addressing was the inherent weakness of a landing force against counterattacking armor. The invasion of Tarawa had very nearly been foiled by attacking Japanese light tanks. If the Marines attempted future landings against opponents with more potent tanks the result could be disastrous.
This was the point when the T-43 (now standardized as the M-103 heavy tank) was being refused by the US Army. The vehicles were eagerly adapted by the Marine Corps which also funded the modification of the tank to the M-103A1 which rectified most of the initial problems. Small numbers (about 75) of these M-103A1s were briefly loaned back to the US Army stationed in Germany to provide long-range fire support for American armored divisions.
The M-103s were later updated with many of the fire control and drive train components (most noticeably the redesigned engine deck covering the more powerful diesel engine) from the later M-60 series and received the updated designation M-103A2s.
While the Marines continued to operate the M-103 until 1974 the tank was never used in combat.
| The kit |
This kit is second release from Dragon in their Black label line. This is also the first time that this tank has been produced in 1/35th scale in styrene.
I am not going to go over the major accuracy issues covered in other reviews other than to note them.
Purists reviewing this kit and comparing it to the original artifact have complained that the bow is too long and curved and the engine deck also the incorrect length. Both of these issues result in first and last road wheels being out of place. The turret is incorrectly shaped both on the underside and on the ‘forehead’.
Most of these problems can only be rectified with major surgery so builders of this kit should consider being content with a model built mostly straight from the box.
To most builders these problems remain mostly unnoticeable until you try to attach the turret and find that the exhaust deflector on top of the engine deck gets in the way of its traverse. I have seen some builders fix this by cutting the underside of the deflector back by 5mm.
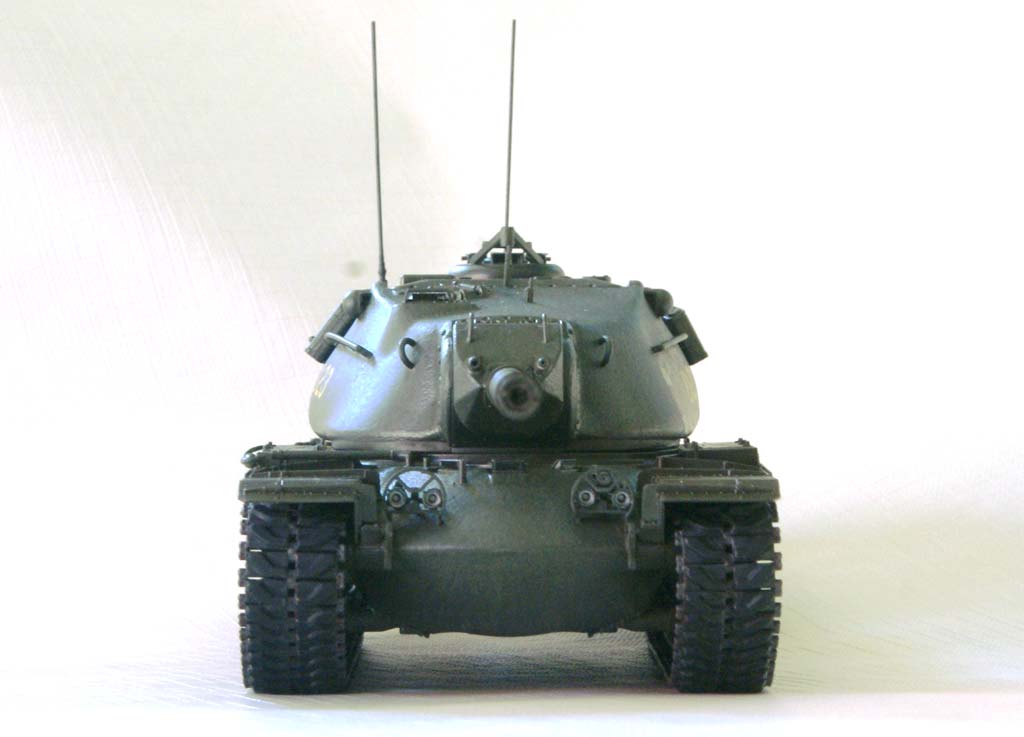
The first of two complaints I have regarding this kit are that while the box art displays a mantlet cover unfortunately Dragon did not include such a piece instead leaving the gun mantlet naked. Some old-school detailing with tissue or foil could improve this look.
Finally the gun tube is too short and too small in diameter, but I will discuss this later.
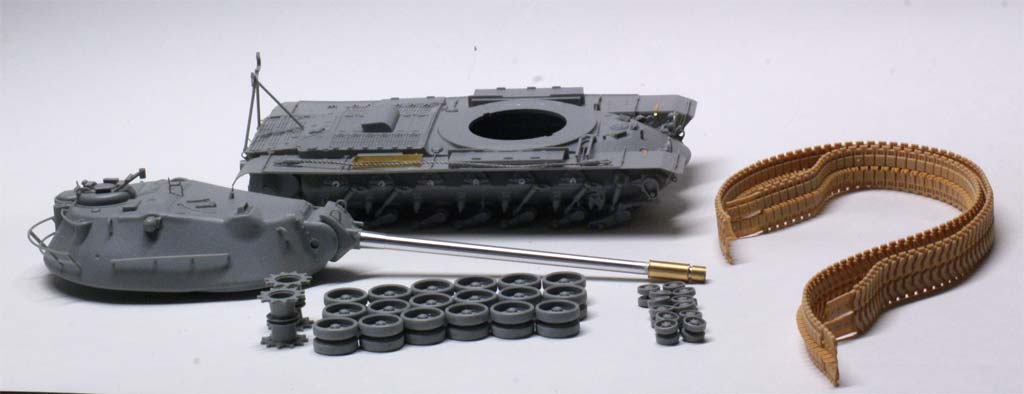
Contents of the kit include: 11 spruces, flexible one piece tracks, a small patch of photetch, and a short link of braided wire for the tow cable.
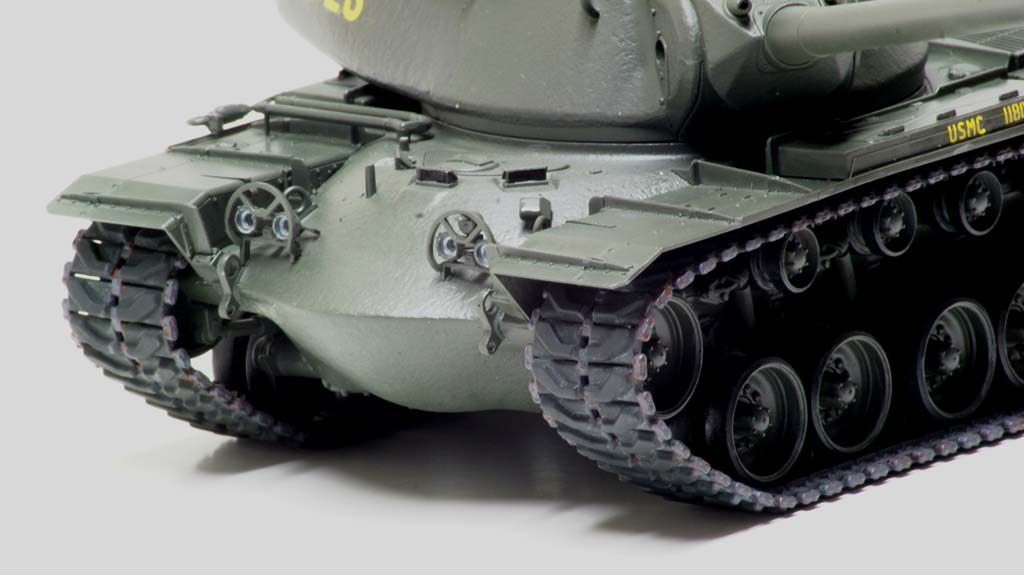
Included are many extra parts associated with the engine decking and fenders which will be used in the A2 version, due out shortly. Also several of the spruces are recycled from previous Dragon kits such as the machine guns coming from their M2 Halftrack kit and the road wheels are borrowed from the M60 kit. This leaves the builder with many extra duplicates for the spares box.
I was disappointed that the kit does not include a clear spruce for periscopes or lenses for the headlights.
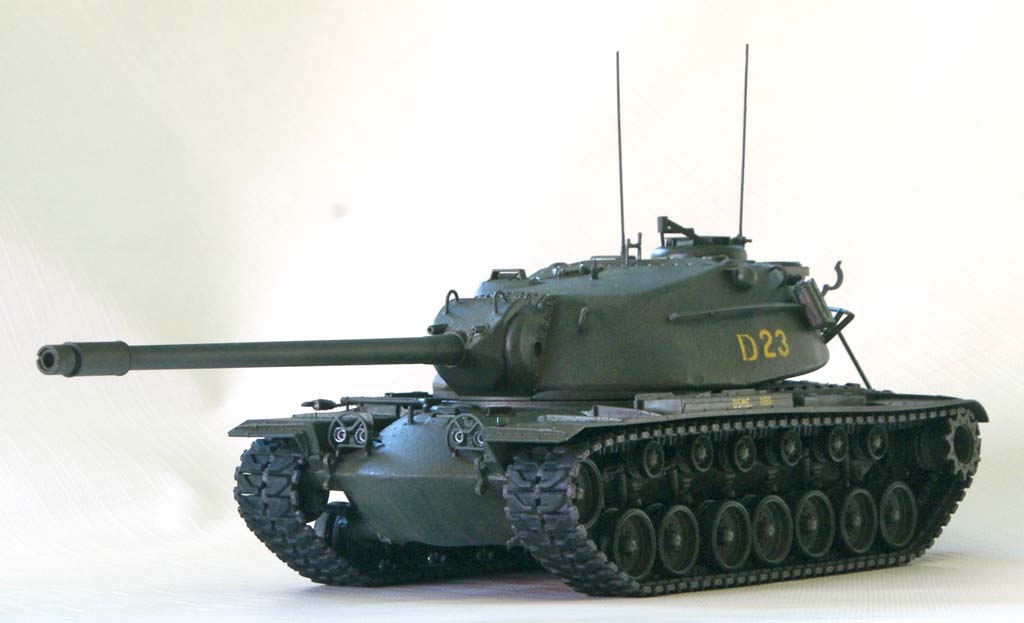
Decals are included for two of the less common US Army vehicles and for one USMC tank.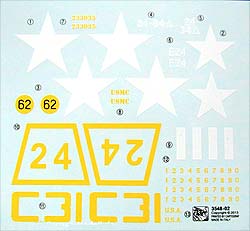
| The build |
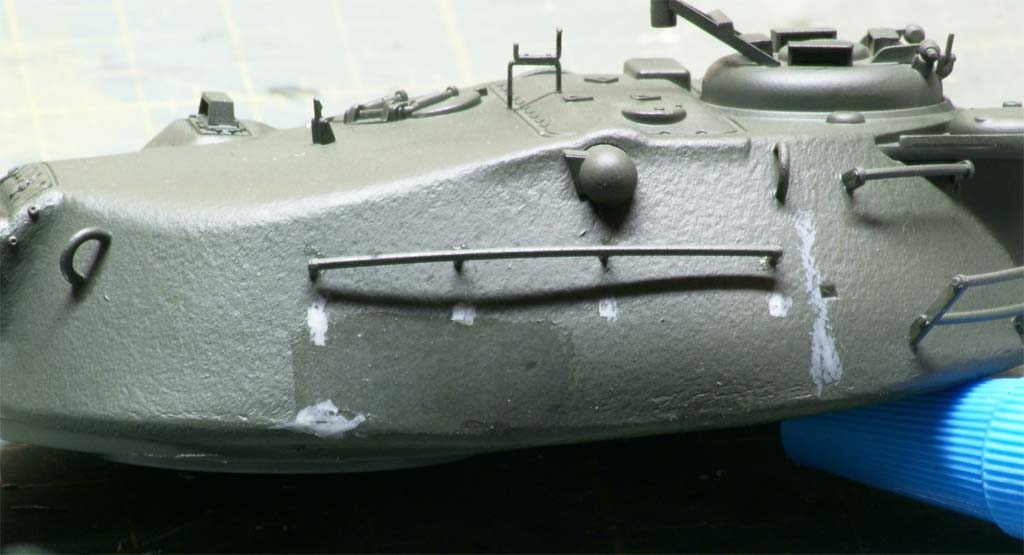
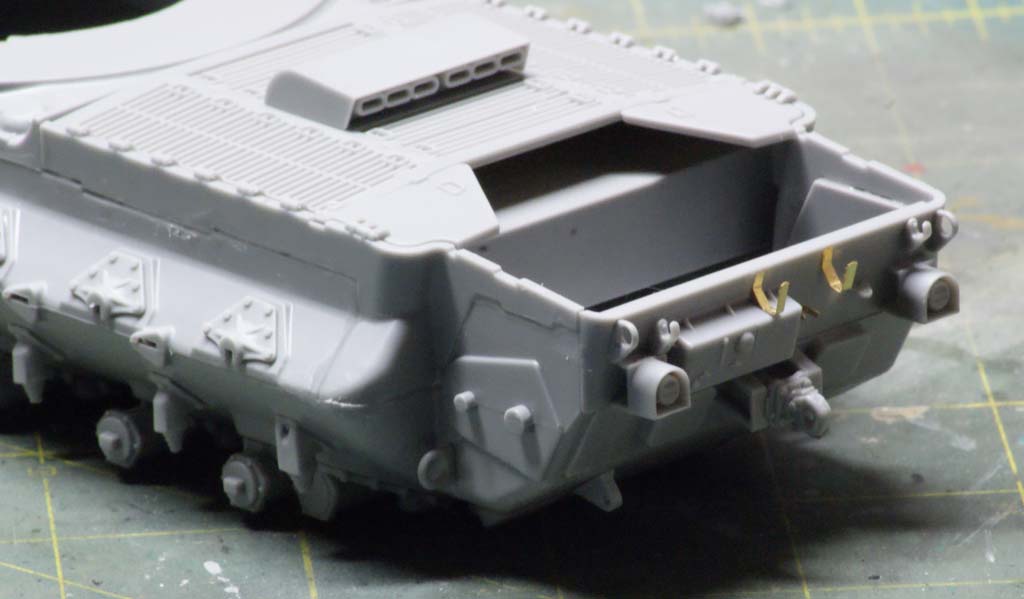 I started with the hull which is fairly straightforward with some concerns about the fit in the rear quarters; the hull sides are glued edge to edge with little overlap and leave a noticeable seam difficult to fill due to the contours around it. Fortunately these are mostly obscured by the fenders and drive gear assembly.
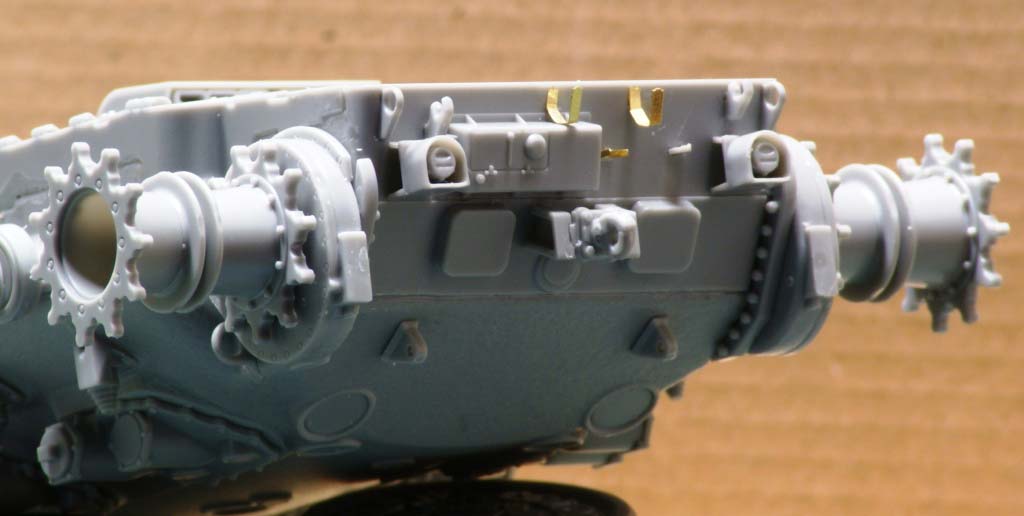
The hull is constructed with a major structural unit through the engine bay and as such attempting to install an engine will require a major rework of the hull.
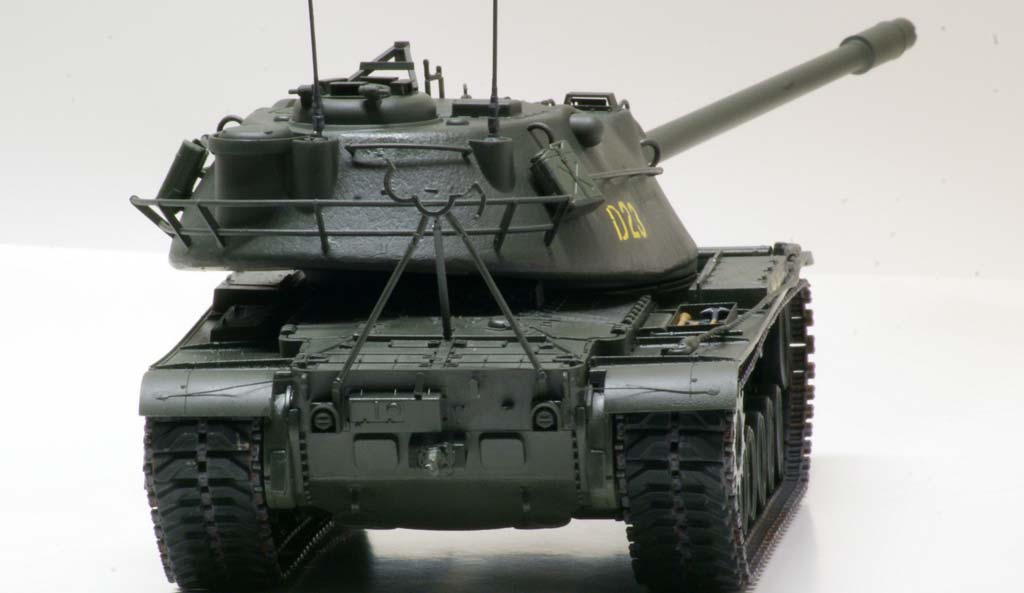
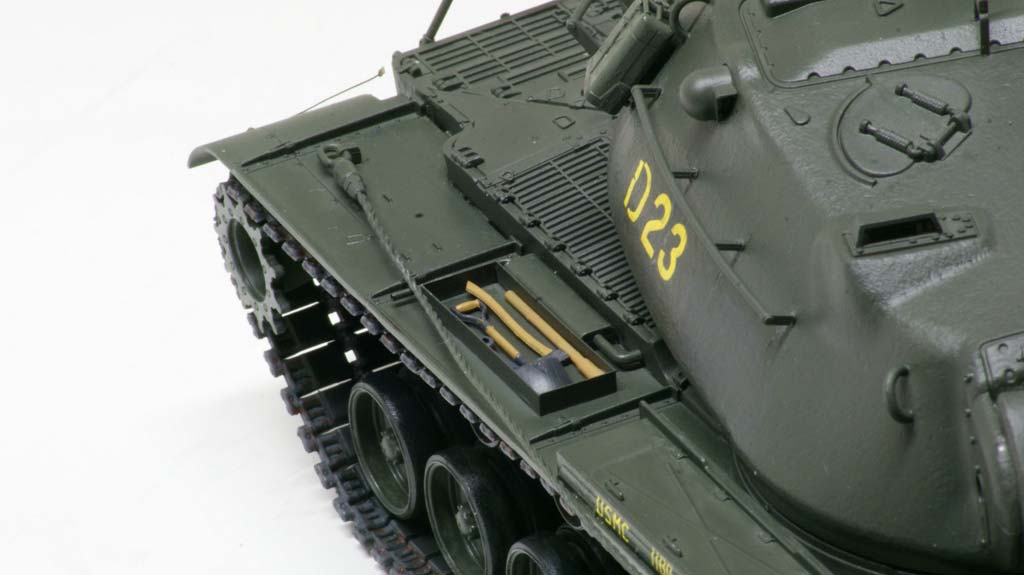
I mostly followed the directions through the seventeen steps illustrated to complete the hull and turret. I left the road wheels and return rollers off until after painting. Also the drive sprockets were left off to allow for the installation of the flexible one piece tracks after they were also painted. Fortunately the sprockets fit very snugly and can be trusted to remain in place with without glue. I also assembled the gun travel-lock in the deployed mode as I intend to use it as part of the camouflage later on. But good eyes will note that the replacement barrel is now too large to fit.
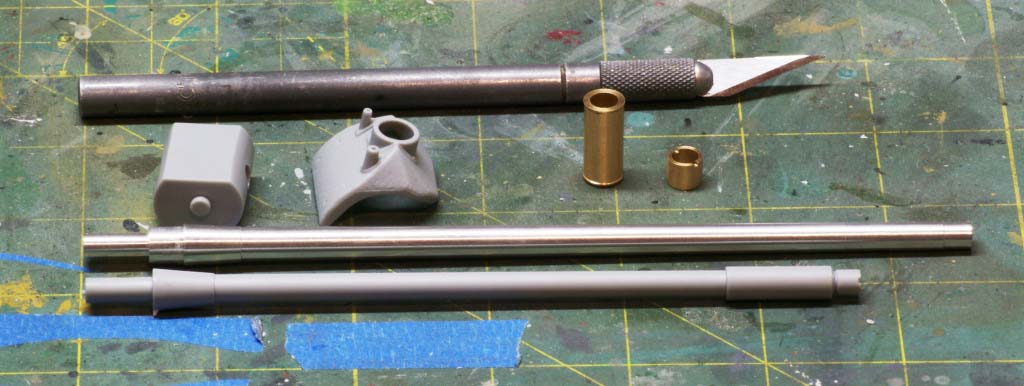 One addition I did purchase was an aftermarket
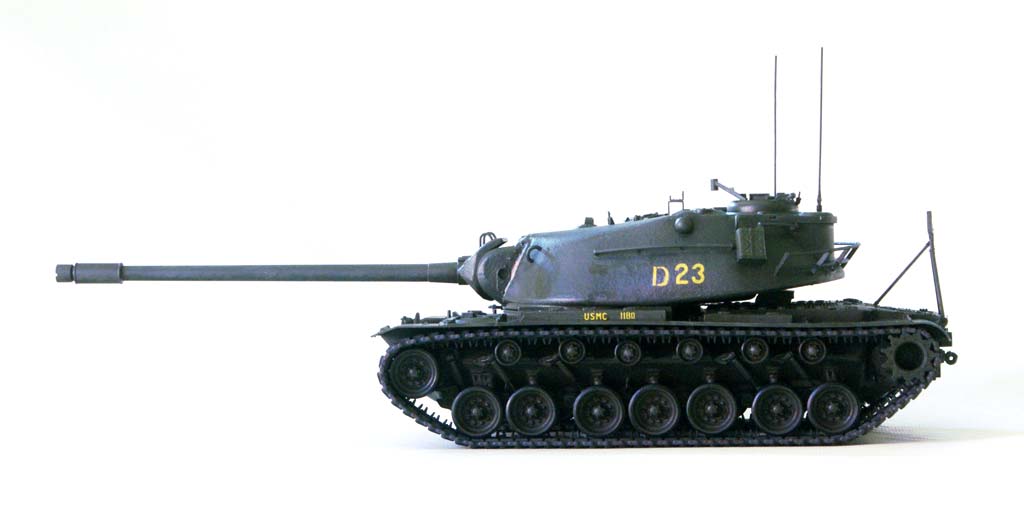
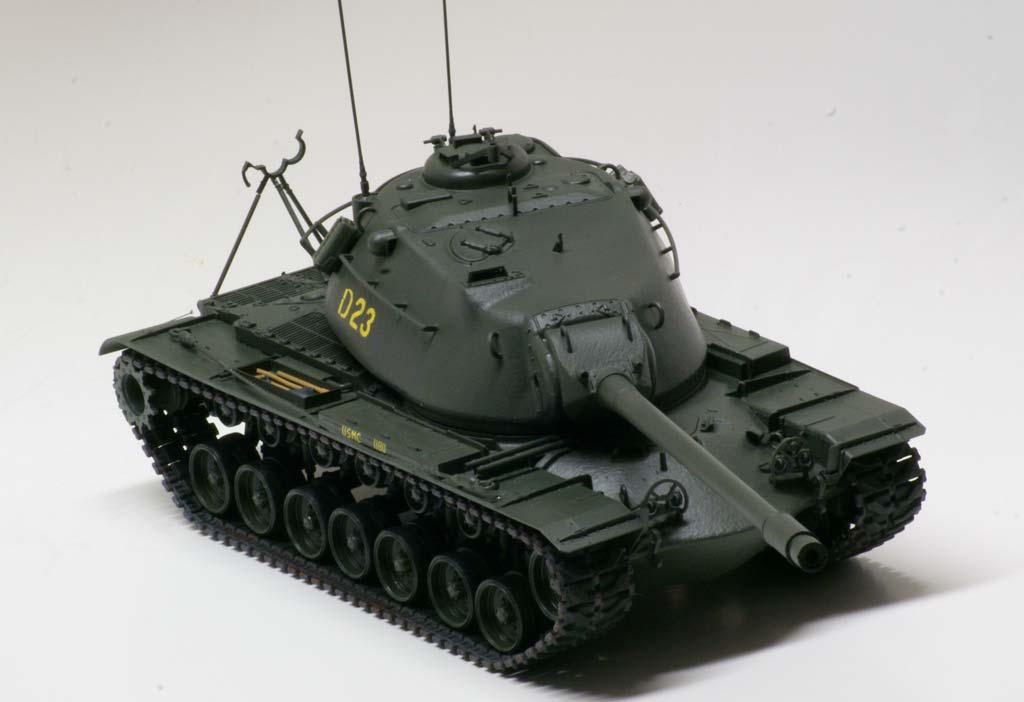
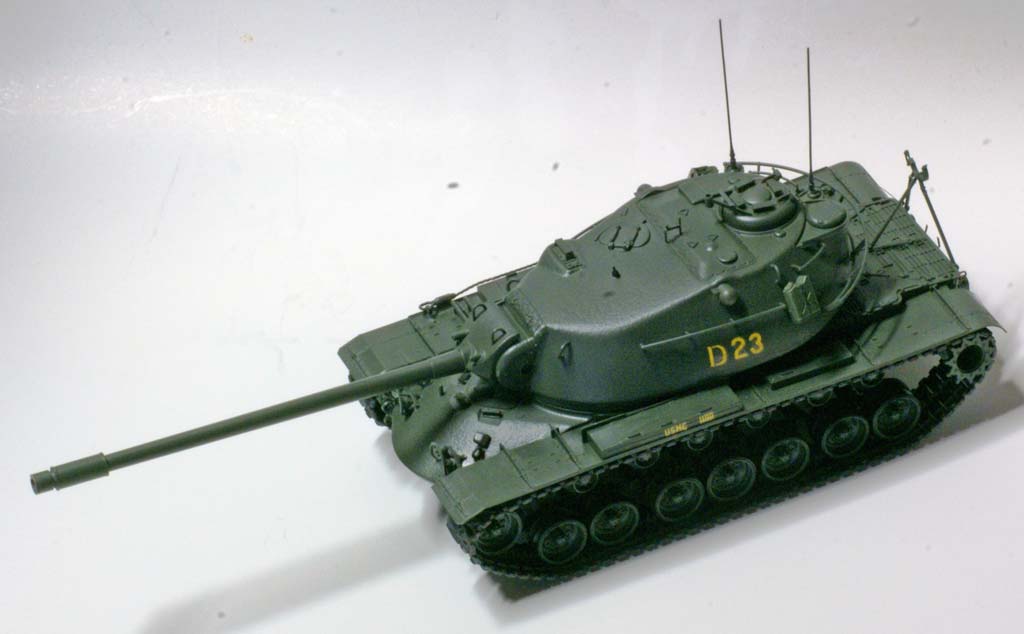
 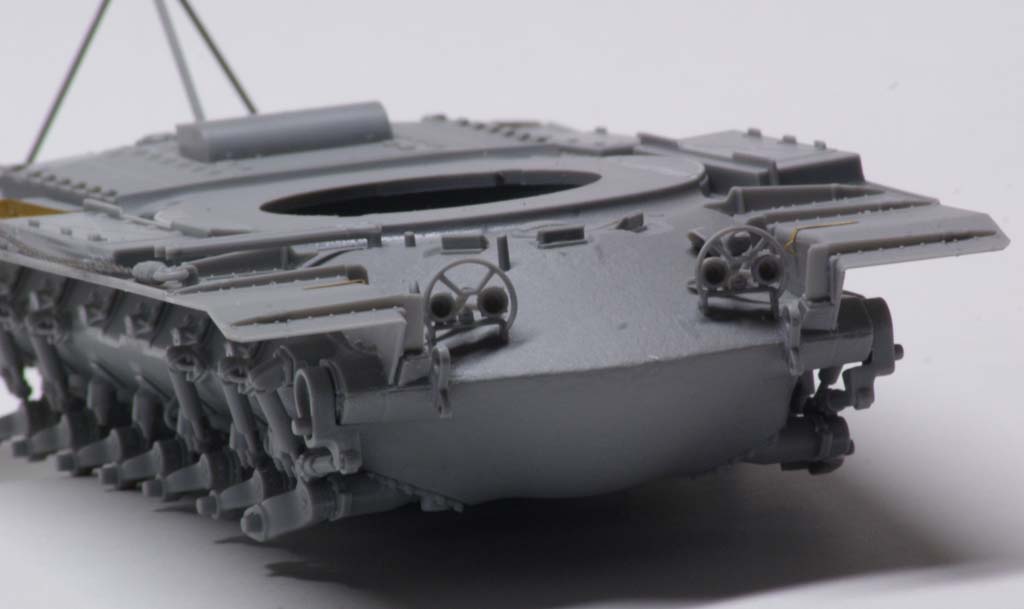 turned aluminum barrel from RB Barrels (# 35B132). This is both the proper length and diameter and gives a much more satisfying look. Installation was very simple, sliding right into the mantlet. While the kit supplied gun slides in from the back of the mantlet the replacement enters from the front.
| Painting/Weathering |
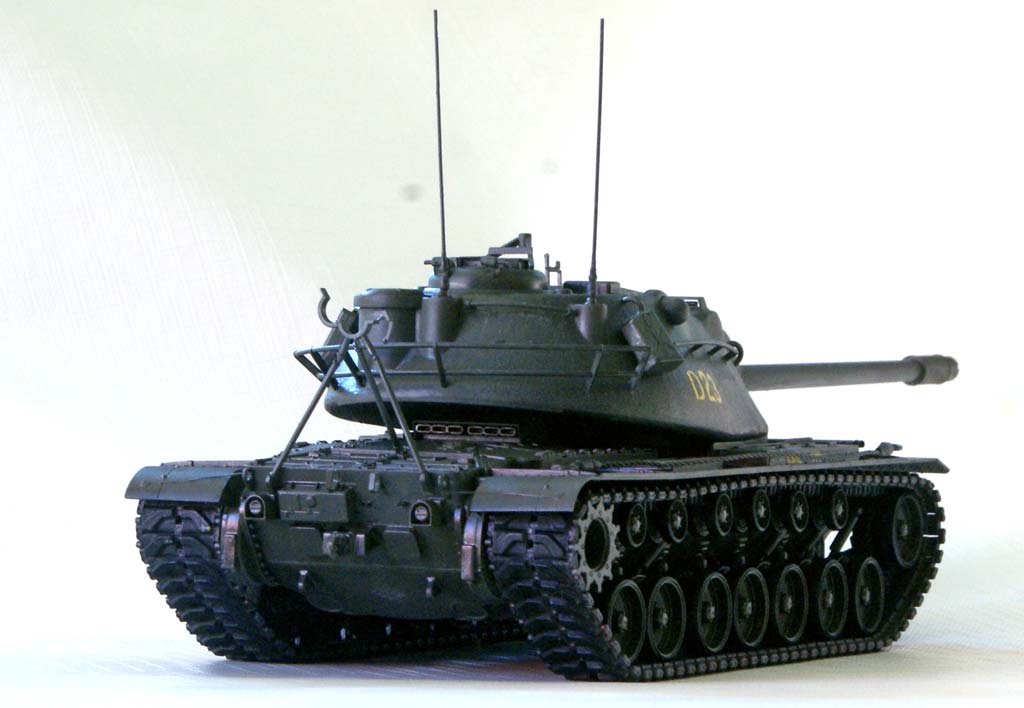
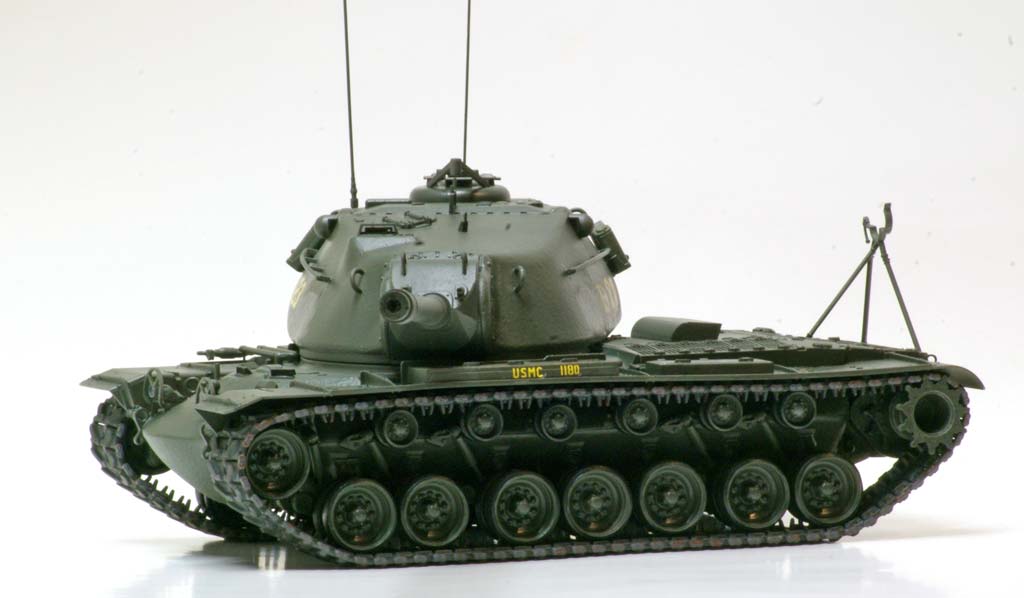
 The turret, hull and all the wheels were primed as subassemblies along with the tracks with Model Master Neutral Grey.
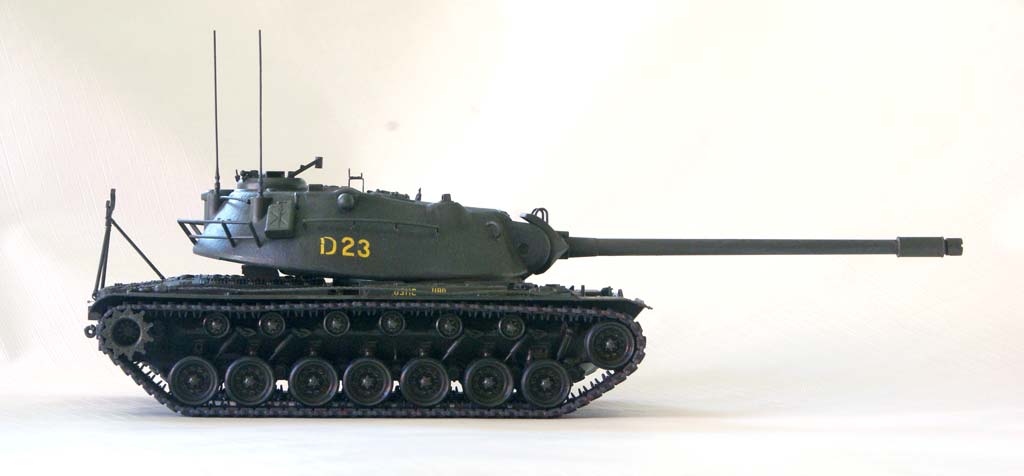
Next a coat of Marine Corps Green, FS 34052 (Model Master Enamel #2025) was applied to the entirety of the tank with the rubber portions of the road and return wheels painted in NATO black (Tamiya Acrylic XF-69)
As the tracks are rubber blocks they were also painted with the NATO black and then the metal connectors were detailed with Tamiya Acrylic XF-77 (IJN Gray). I detailed the tools with wood handles (Model Master Acrylic Wood # 4673) and painted the metal parts with Model Master Acrylic German Gray # 4742. Finally I touched up the periscopes with Gloss black and the interior of the headlights with Aluminum.
Decals
 I wanted some variety with the decals on my tank but the research showed very little. The markings on USMC in-service vehicles were little more than a serial number and a platoon designation.
I initially misread the in kit decal sheet thinking that it only had markings for US Army tanks (the directions do not specify that the last vehicle is Marine). I wanted to depict the more common USMC tanks. I utilized Bison Decals #35181 (USMC M26 Pershing tank in Korea). These are excellent decals and would give the option to present a more ‘in-theater’/hand applied look if one wanted to portray a tank in combat. Unfortunately the maker is discontinuing the Bison line and this decal set may soon become difficult to find.
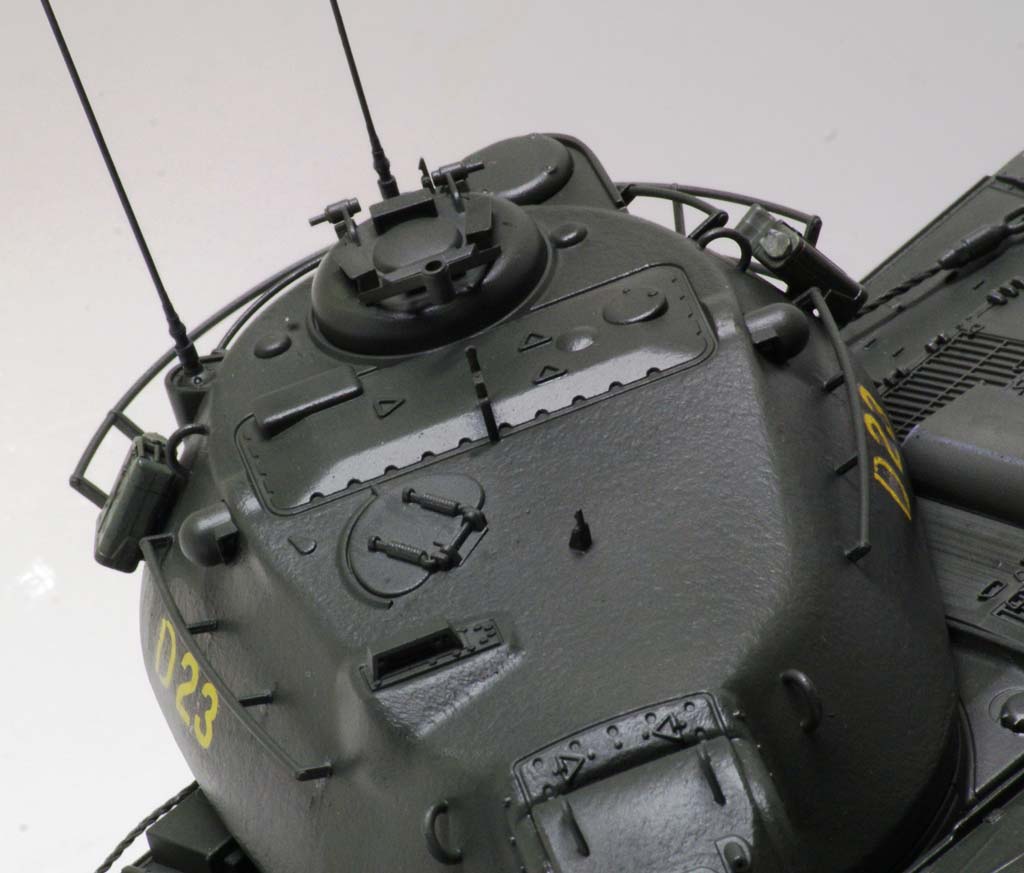
While getting ready to place the platoon numbers on the turret sides I decided that the side turret racks (part # F33 &34) were a bit too low for proper placement. So I repositioned them about 5mm higher and repainted the resulting holes and a seam line on the turret side that I also noticed and cleared up at this time.
Weathering
After applying the decals and satisfied with the painting I applied an overall coating of Testors Glosscoat thinned with Testors Metalizer thinner to seal the decals and base coat. I then applied a bit of an oil paint pin wash to deepen the shadow lines, recesses and oil stains in the road wheels. All this was followed by a light airbrushed dusting of Tamiya Deck Tan (XF-55) overall.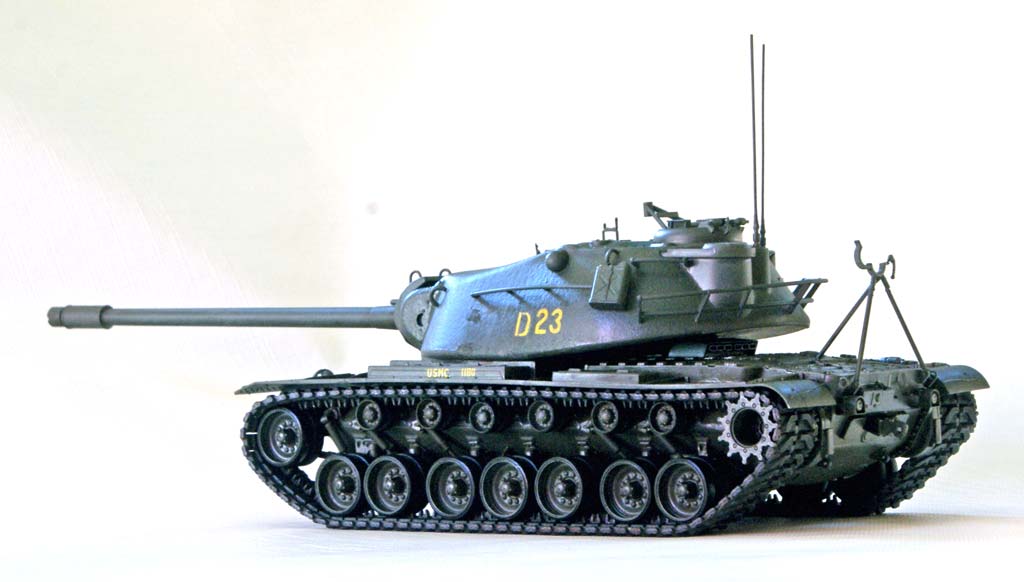
| Final conclusion |
Admittedly, the kit has large accuracy issues which can only by cured with major rework. If one accepts that this build will result in a tank that ‘looks like an M-103’ (and it does make for a good clean model) you will find that it is a simple, mostly trouble-free build. I decided to switch out the barrel as the 12.0cm gun is the raison d’être for this tank. As I will be displaying it in comparison to both the light and medium American tanks from the same period I wanted it to have the full effect.
Note: Voyager Models has just come out with two update sets for the M103
PE35686 US M103A1 Heavy tank Basic(Gun barrel include) (For DRAGON 3548)
PE35698 US M103A1 Heavy tank Fenders (For DRAGON 3548)
Things I like:
An uncommon subject illustrating the largest tank ever produced in America.
Simple straightforward build.
Things needing improvement:
Barrel needs replacement to get proper length and diameter.
No interior.
Turret will not turn without modification to engine exhaust.
Lack of any clear parts for periscopes or headlight lenses.
| price/performance: | ***** | fitting quality: | ***** |
| details: | ***** | difficulty: | ***** |
 |
 |
 |
 |
 |
 |
 |
 |
 |
 |
 |
Recommended references:
http://www.militaryfactory.com/armor/detail.asp?armor_id=206
http://www.tanks.net/early-cold-war-tanks/m103-heavy-tank.html
http://www.primeportal.net/tanks/greg_smith/m103/index.php?Page=1
http://www.voyagermodel.com/productdetails.asp?itemid=PE35686
M103 Heavy Tank 1950-74, Kenneth W. Estes, New Vanguard (2013)
© 10/2014
16713 readers of this build report since 15.10.2014