|
|
Erbauer: Eric Verbene
1:35 Bausatz von 16.02
Original: 5.5cm Flak (VG2) Gerät 58
Modell: 16.02 Nr. VK35001 5.5cm Flak (VG2) Gerät 58
AUSGEPACKT: 5,5cm Flak (VG2) Gerät 58
Hi, I am Eric and I'm a model builder from Eindhoven Netherlands. My english is not very good, but i hope you understand, what I wrote.
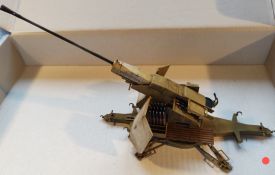
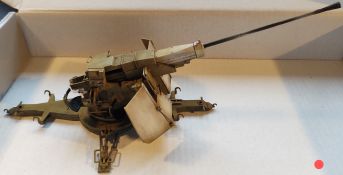
Most of the time I build 1/35 WWII military. Just as my latest item, which is the 5.5cm Flak (VG2) Gerät 58. Down here I'll give you a short impression, tips and colours of paint I used on this 1/35 kit.
The small booklet is nice and clear. However there are some little failures in the construction steps of some numbered parts forgotten.
The beginning:
Step 1-2 the gun base, nothing wrong with it and all parts fit very well. You may choose in travelling of firing mode.
<<<first tip: glue part C4 (above) and B8 (inside) togheter on A1 before fixing A4 to A1. Take care because C4 has to move see also photo 1 i tried to explain in a sketch drawing>>> This tip will take care of youre Flak not tot fall forward. I saw this problem to late but i fixed it with a small rubber cap fitting over the small round standard under C4.
Step 3 Building of Flak, all parts are fitting perfect, but don't forget to use part Pe2 which has to be fixed on Pe1 with AC glue.
Part Pe2 is not shown on the building step see photo 2.
Also in this step you can choose between a metal or plastic barrel.
Step 4-6, building of Flak base, also has a little failure in step 5. You have to glue the C parts as shown in photo 3.
Step 7-10, here you have to be very carefull because there are very tiny and small parts tot glue. As there are D8, D7, C11, all step 8....D7, C12, C13, all step 9.
In step 10 you have part B8 if you are fixing it there as on the drawing than youre Flak base won't be contacted with the gun base. Also youre Flak will fall forward.
Painting/Airbrushing:
After step 10 you have to Paint or airbrush your Flak 5.5cm.
I did both, overall i airbrushed the Flak first in Tamiya XF1 and later on in Tamiya XF60. After this i took Tamiya XF2 and sprayed it on the front part of the Flak and the Panzershields, Just between the XF60.
Detail painting i did with a brush using also Tamiya colours as XF1, XF2, XF7, XF52, X23 Painting ammunition, here for i used a mix of XF9/XF12, XF2, XF7, XF63.
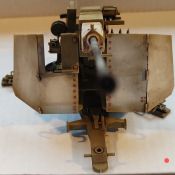
For the finishing result of this 5.5cm Flak (VG2) Gerät 58 see my photos.
 |
 |
 |
 |