|
|
|
Deutsch verfügbar |
  |
| The original |
At the end of 1944 the first prototypes of the 3cm Flakvierling were completed at Ostbau-Sagan, using components of the 2cm Flakvierling38 and MK103 cannons. The completed weapon had a very destructive power with a rate of 28 rounds per second there we 2.1kg explosives in the air!
To get this weapon mobilized it was first tested on a "Möbelwagen", later in a modified "Wirbelwind". In December 1944 one complete prototype is said to be completed. Photos or reports of that are not known!
| Der Bausatz |
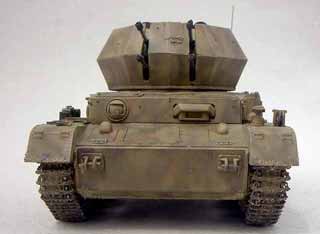
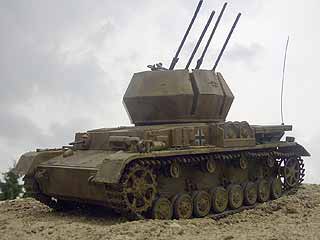
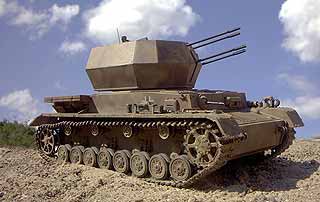
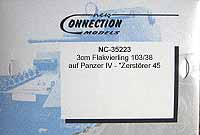
The conversion kit 35223 from New Connection for the "Zerstörer 45" on Wirbelwind base is put together from kits 35188 and 35134, the 3cm quad gun and the Wirbelwind detail set. The conversion kit needs the new Tamiya Wirbelwind as base kit, with a bit handicraft you can also use the old Tamiya Wirbelwind. The conversion kit includes about 50 parts with a new, complete Wirbelwind turret with correct gun mount, floor plate, engine compartment wall and struttings for the hull interior, which you can see from above. All is molded very fine and detailed, while the upper part of the turret of my kit was a bit distorted in the angles, a minor problem of which I will speak later. The 3cm quad gun is very nice detailed also as the small parts are. The barrels are turned metal barrels while the muzzle breaks are made of resin. The location of the moulding-connection to the parts are relatively good ... some make more work, where others are perfectly chosen and easy to cut down.
The only disadvantage is the instruction, with only seven drawings, which has some vaguenesses with the exact positioning and alignment of parts ... so you sit some minutes with a part in the hand and wonder how and where to glue exactely. Nevertheless nothing that couldn'r be solved!
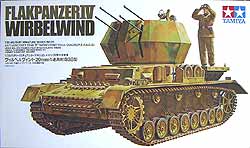
The base kit which I used was the Tamiya Wirbelwind 35085. A good kit with good quality. Only the tracks need a replacement and the hull is a bit out of dimension. The parts are with good detailing and you get 4 crew member figures. If in doubt I would suggest the new Tamiya Wirbelwind kit for this conversion even that is much more expensive!
| The construction |
 As always I begin with the construction of the base kit which is easy to assemble. With the fitting in of the rear plate as well as exhaust muffler, swing arms, final drives and some more small parts the lower hull is nearly ready. Since this kit was made as a moving toy there are some interior relicts for holding motor and batteries. Drive sprocket and tracks are made for movability and not for correctness and therefor too wide. So I used the Friulmodel metal tracks ATL-28 and fitting drive sprockets AW-04. The final drives of the kit were made for the drive sprockets with poly cap to fix, so I had to cut the axle
and drill a hole through to fit the axle of the friul drive sprockets ... hewe you have to watch out that you drill exactely in 90° angle. Additionally I had to cut the distance ring from the Tamiya drive sprocket to fit in the Friulmodels.


The idler wheel and road wheels can the easily be done with the poly caps and fixed to the running gear.
Next is the treatment of the interior to fit the interior parts of the fighting compartment from the conversion kit. The struttings in the hull need to be removed, a damned work ... also it is good to fill all the holes in the hull with putty.
When using the old Tamiya Wirbelwind kit the next step is to align the gun mount to the correct position as it is made to be in an asymmetric position to the left like the turret is in the new kit. Here it is in the middle so the gun mount has to be cut and moved a bit to the right.  First of all I glued in the engine compartment wall and front strutting (which is not clearly visible from the instruction where to position, so you have to try).
I had to rebuild the two profiles, on which the two beams of the gun mount will rest, because I destroyed them while removing the glued beams from them when I noticed the wrong position of the gun mount within the turret ring. Before glueing in the second profile you have to set in the gun mount in the upper hull without glueing, then you glue the second profile on the other side. If glueing both profiles without positioning the gun mount in place you will have problems to move it into place because of the limited space. Next I put two thin threads across the turret ring to get the exact middle and positioned the gun mount! The rest is easy .. glue in the bottom plate and two small strutting profiles at the interior sides.
 Of course you shouldn't forget the interior in time when you can reach everything.
After that the upper hull can be glued to the lower hull which is no problem except for the gap that comes at the rear end of the engine deck and should be filles with putty.
The upper hull then gets some more accessories from the base kit like spare gun barrel boxes, tools, handles, spare roadwheel holder, etc.
So what is leftover is "only" the turret with guns. At first there is a lot of sanding needed to remove excess resin from the lower turret part with turret ring and some unevenessses of the turret ring outside to fit into the Tamiya hull!
The upper part of the turret was unfortunately a bit bent in the angles and uneven in the contact area to the lower part so it wasn't easy to make both parts fit without having gaps. What helps a bit is to sand both parts a bit where you have to watch out with the upper part not to break it or sand it asymmetrical. Then I glued the both turret parts bit by bit, so first I glued the rear, then wall by wall to the front ... EACH time checking the exact fitting of the corners and correct it if not. The rest should be anded and filled with putty if needed. So, you get a good and nice turret!
The four struttings at te front inside of the turret should be installed later when the gun is completed, to see where they can be placed since the barrels and their mountings are a bit thicker than the 2cm barrels. Here it was at last only 10th of a millimeter. According to that the cut out for the barrels in the turret front also need to be widened a bit, but this also then when the gun is in place to check where and how much to cut away.
 The quad gun makes an excellent impression and is good to assemble. But you need to study the instruction very good to avoid to glue parts in the wrong place or circled 180° ... while glueing with cyanoacrylate such mistakes often result in damaging parts when trying to remove!
The gunners position with handwheels fits good to the socket. The cannons themselves are much more interesting. Two of them are glued to one plate. Here you have to watch out that they are aligned absolutely parallel.  This is especially meant for the barrels ... here you have to look in every direction that there is perfect alignment. The positioning of the ammo-drums is not clearly shown, so you have to try where and how it fits best.
Unfortunately the whole gun is (like always with resin kits) not movable for elevation but should be glued in a desired position. The good thing with this kit is that is easy to make it movable. So you just have to drill a hole through the socket with the correct diameter for the small axles of the both gun plates and connect both with  small a steel rod (cut to the right length) which is set into each axle of a plate by drilling a small hole into them for the rod. Again you have to check the alignment of each of the four barrels ... it happens too easy that one gets a bit bent.
Even the gunners view can made movable together with the elevation of the guns ... a great PLUS!
The muzzle breaks are fine detailed, but have the moulding connection on the side where it should be glued to the barrels, so you have to cut tricly and drill a bit to recover the hole.
 The completed gun can be placed on a bottom plate which is glued prior to the turret and so you can recognize where the barrels need more space to position the struttings a cut a bit more off the barrel-gaps in the front turret. Then the gun can be glued into position!
After the painting of the vehicle the tracks can be fitted and so your ready with construction!
| Painting/weathering |
 The paintjob is somewhat easy ... first the interior was painted in a bit darkened white and is drybrushed with metal color. More is not to since you can't see much of the interior through the turret.
The whole exterior of the tank was primed in Revell #38, which is mixed a bit with grey and brown to achive a good red oxide primer.
Then Tamiya XF-59 was sprayed over with the airbrush to give a good base coat. Also the interior of the turret was sprayed with that and gets a slightly different color because there was not red primer.
 The camouflage pattern was achived with small stripes of Tamiya XF-13 and XF-64.
The gun was completely sprayed with Tamiya XF-1 black and then drabrushed with Revell #91 metal color. The socket and gunners vision were repainted in sandyellow while the barrels get a slight coat of Modelmaster Metalizer steelblue.
As for the markings ... I think at that time period such prototype would only have german crosses which  I made with Eduard Express Mask for the airbrush.
After that the while kit gets a wash of black and brown oil colors in turpentine-substitute. Special areas were then again washed to achive a more realistic look.
Edges and corners were drybrushed with a mixture of light ochre, naples yellow deep and titanium white. Some light damages in the paintwork as well as some watermarks were done with dark oil colors soluted in turpentine-substitute.
The tracks were primed with Revell #9 as always and a slight overspraying with Modelmaster Metalizer steelblue ... then a wash with brown pastel-chalk dust/spirit and some sanding to make the contact areas of the track look a bit worn.
At the end I put a bit sand mixed with glue to the running gear. I used very fine sand when thinking of the 1:35 scale. Finally the sand can be painted a bit with mud colors to get a good look!
| Conclusion |
Since I saw the drawing of that "Zerstörer 45" in the "Encyclopedia of German Tanks of World War II" I wanted a kit of it. Thanks to New Connection, who have a faible for good and odd kits, that I now have it. The kit is good and I cannot complain about it ... some of the work I had with the conversion was because of the use of the old Tamiya base kit, istead of the new one, but also the turret and gun need some advanced handicraft as well as the instruction requires own thinking and a good eye. So not really suited for beginners, advanced modellers get an interesting conversion for 40 Euro which builds into a nice vehicle!
Tamiya base kit
| Price /value: | ***** | Parts fitting: | ***** |
| Details: | ***** | Skill level: | ***** |
New Connection coversion kit
| Price /value: | ***** | Parts fitting: | ***** |
| Details: | ***** | Skill level: | ***** |
 |
 |
 |
 |
 |
 |
 |
 |
 |
© 6/2002 Thomas Hartwig
